
AudioReputation is reader-supported. When you buy through links on our site, we may earn an affiliate commission Learn More

In this article, we explore the optimal Spotify equalizer settings to improve your music listening experience. We highlight that the best settings depend on personal taste and the type of audio equipment used. Various presets and manual adjustments are suggested for different genres and audio setups.
Additionally, we cover how to access Spotify’s equalizer on various devices and operating systems. The article also touches on other Spotify features like audio normalization, audio quality levels, and hardware acceleration, which can further enhance audio quality.
If you want a better listening experience with Spotify, buying a pair of high-quality headphones can be expensive. Luckily, there is a way to significantly improve your sound without spending a dime: using the built-in equalizer of the streaming service.
However, this isn’t the most user-friendly task to do. Your personal preferences play an important role in determining the best configuration for your music taste, so there is no one-size-fits-all setting.
That’s why I’m here to help you today.
Hi! I’m Ian, a specialist in music production with nearly 10 years’ experience. I will help you improve your sound with the Spotify equalizer. Let’s get into the article.
Table of Contents
- Best Spotify Equalizer Settings to Make Music Better
- What Can the Spotify Equalizer Do
- How to Access Spotify Equalizer
- What is the Best Spotify Equalizer Setting?
- Bass Booster Preset – If You Like Listening to Bass-Heavy Music Genres
- Acoustic Preset – If You’d Like a More Natural Response
- Dance Preset – Best for EDM Fans
- Pop Preset – If You Like Loud and Clear Vocals
- Small Speakers – If You’re Listening to Music on your Smartphone Speaker
- Manually Boosting the Mids – If You Listen to a lot of Podcasts
- Bonus: Manually Boosting the Lows and Highs – An All-Around Solution
- Bonus 2: Manually Tailoring It According to your Headphones
- Other Spotify Equalizer Settings You Should Know
- The Best Spotify Equalizer Settings for Earphones, Speakers, and AirPods
- Best Spotify Equalizer Settings for Car
- FAQs
- Conclusion
Best Spotify Equalizer Settings to Make Music Better
The best Spotify equalizer settings to make music better will best fit your headphones/speakers and personal preferences the most. There is no easy answer to this question, so we always recommend you adjust your Spotify equalizer in real-time while listening to your favorite songs.
What Can the Spotify Equalizer Do

The Spotify Equalizer allows users to personalize their listening experience by adjusting audio frequencies. This feature enables the enhancement of certain elements in music, like bass or treble, to suit individual preferences. It’s particularly useful for tailoring sound to different music genres, headphone types, or listening environments. This customization leads to a more enjoyable and tailored audio experience on Spotify.
An equalizer is a useful tool designed to shape the audio to your preference.
With an equalizer, you can, for example, filter, attenuate, or boost a particular frequency in the frequency spectrum and tailor your listening experience to your liking.
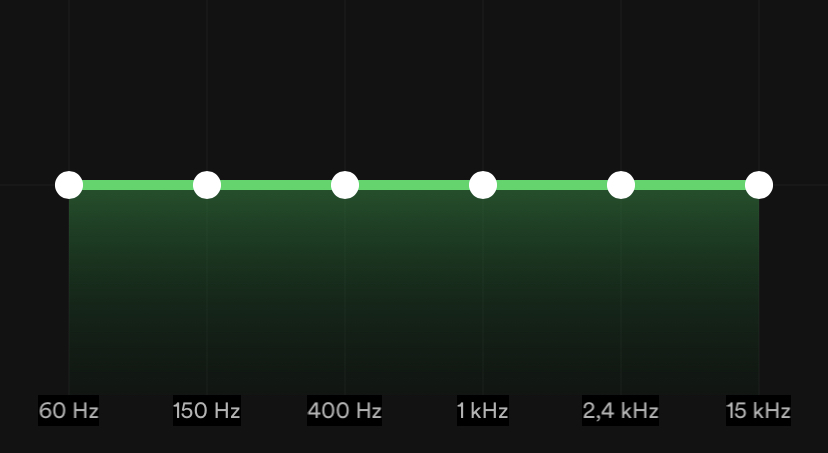
The Spotify equalizer features 6 bands that you can move up or down to boost or attenuate a specific frequency, respectively. This type of tool is called a parametric equalizer.
The Spotify equalizer also features presets for easier swapping when you’re, for example, listening to different music genres back to back or swapping your pair of headphones or speakers.
The equalizer is very useful in a wide range of situations. For instance, it is widely known that most consumer-grade headphones don’t have a flat or balanced response and will reproduce certain frequencies more accurately than others. You can use the equalizer to improve the situation and make your sound more balanced.
Another situation where the equalizer is useful is when you want to tailor your sound according to the music genre you’re listening to. For example, fans of hip-hop music will certainly like more bass in their listening experience than jazz and classical music fans.
How to Access Spotify Equalizer
Accessing the Spotify Equalizer involves navigating through the app’s settings. For mobile devices, you go to ‘Settings‘, then ‘Playback‘, and select ‘Equalizer‘. On desktops, though, Spotify doesn’t offer a built-in equalizer. Instead, users can adjust their computer’s sound settings or use external equalizer apps. This feature allows for customized sound adjustments to enhance listening experiences according to different music preferences or audio hardware.
You can easily access the Spotify equalizer in the iOS, Android, or Windows and Mac OS systems by going to the “Settings” app page. Below, we will explain in detail how you can find the tool.
IOS
The step-by-step on how to access Spotify equalizer on your iOS device should be the same regardless of the model of iPhone you’re using. These steps also apply if you want to change the equalizer settings on your iPod or iPad.
How to Access Spotify Equalizer on iOS
- Open the Spotify app.
- Tap the gear icon located at the upper-right part of the screen.
- Tap “Playback”.
- Tap “Equalizer”.
- Turn the Spotify Equalizer on by tapping the slider, changing any parameters, or selecting a preset.
Android
When it comes to Android devices, the process is a little different. The Android Spotify app doesn’t feature a built-in equalizer, but most smartphones featuring the system do.
When you access the equalizer via the Spotify app on your Android device, the system automatically redirects you to your smartphone’s built-in eq. Here are the steps on how to do it:
How to Access Spotify Equalizer on iOS
- Open the Spotify app.
- Tap the gear icon located at the upper-right part of the screen.
- Tap “Audio Quality”.
- Tap “Equalizer”.
- You should be redirected to your smartphone’s built-in equalizer; the next steps will depend on your smartphone’s manufacturer and model.
Windows & Mac OS
The Spotify app doesn’t feature a built-in equalizer if you’re using Windows or Mac OS. If you wish to have this feature, you will have to install a third-party solution depending on your operating system.
What is the Best Spotify Equalizer Setting?
The best Spotify Equalizer setting varies based on individual preference, music genre, and audio equipment. We suggest that there’s no one-size-fits-all setting. Instead, it provides genre-specific recommendations and tips for adjusting the equalizer to enhance different aspects of music, like bass or vocals. These customizable settings aim to optimize the listening experience for each user’s unique taste and audio setup.
Now, we will list some of the best Spotify equalizer settings you can use to enhance your music and listening experience. These vary from presets you can find on the app to manual tunings.
As we said before, the best Spotify equalizer setting will highly depend on what pair of headphones you’re using, the music genres you listen to, and your personal preferences, so we can’t recommend a setting for everyone.
You can also check out the Best Around-the-Neck Bluetooth Headphones for better music.
We recommend, however, that you test each one to find the best setting for your particular use case. Listen to your songs and tailor your equalizer according to your liking in real-time. Now, let’s look at some of the best settings for the tool.
Bass Booster Preset – If You Like Listening to Bass-Heavy Music Genres
The bass booster preset present on the Spotify app for iPhone is an easy way to, as the name implies, make your low-frequency content more powerful in a balanced and non-overpowering way.
The preset starts with a boost from the 60Hz to the 2.4kHz area that gradually tapers as it enters the mid-frequencies. This setup is better than just boosting the low frequencies up since this could be overpowering, and the gradual fade will make your overall response sound much more natural.
You can, of course, tailor the preset to your liking. We suggest you try sliding up the 150Hz and the 400Hz area if you’d like to boost your bass response even more but be careful not to overpower it, as we mentioned before. There are many ways to Increase Bass on AirPods? check out for more details.
Acoustic Preset – If You’d Like a More Natural Response
The acoustic preset’s name suggests what it is great for: acoustic ballads and folk music genres. The preset works well if you’re into singer-songwriter and acoustic guitar tunes.
The acoustic preset features a slight boost on the low-end, which sometimes might sound underpowered in a lot of acoustic ballads depending on the pair of headphones you use, as well a gain on the 2.4kHz area, which is where most of the human voice content is placed around.
This preset is also very useful if you also listen to other music genres besides acoustic ballads and folk but would like a more natural response that mimics them more transparently.
Dance Preset – Best for EDM Fans
If you mainly listen to EDM music, then boosting the low and mid frequencies might be a great idea. This is because the music genre has a lot of content on the bass area, such as the kick drum, and essential parts of the song, like the vocals, are frequently on the mids.
The dance preset, present on the Spotify iPhone app, does exactly this. It gives a considerable boost to the low frequencies around 50Hz and 150Hz, as well as to the mid frequencies, starting at 400Hz and going up to 2.4kHz.
Depending on your preferences, you might want to boost the highs (15kHz slider) as well since this frequency is not enhanced by default, and you might get a more balanced sound if you do so.
Pop Preset – If You Like Loud and Clear Vocals
The pop preset slightly attenuates the low frequencies and gradually boosts the mid frequencies. This configuration enhances the vocals, which is one of the most critical elements of any pop song, naturally.
If you like to listen to bass-heavy pop, we suggest an alteration to this preset: a slight boost in the 60Hz area to bring it back to mid-level, as it will improve your listening experience.
However, the mid-range boost on this preset might be overpowering for certain songs. You can reduce the effect slightly for a more transparent listening experience and natural vocals.
Small Speakers – If You’re Listening to Music on your Smartphone Speaker
If you’re listening to music on your smartphone, you may already know that the speakers’ performance on most devices isn’t the best. This is because they are small and designed to be compact rather than sound good.
There is a setting on the iOS Spotify that might help with that: the Small Speakers preset. This particular preset will boost the lows, an area frequently lacking when it comes to most smartphone speakers, and raise the highs for a more holistic performance.
Depending on the model of your smartphone, you can also attenuate the mids a little more, especially the area around 400Hz and 1kHz, so that it doesn’t sound too radio-like.
Manually Boosting the Mids – If You Listen to a lot of Podcasts
If you listen to many podcasts, you naturally want an equalizer configuration that enhances the voice content on your audio so that you listen clearly to what is being said.
The best option, in that case, is to boost the mids manually. You can gradually boost the 1kHz and 2.4kHz sliders in real time until you find the optimal position. Boosting the 15kHz area is also useful, depending on your personal preferences.
If you want to improve your podcast listening experience further, try attenuating the 60Hz area a little bit as well, as this will avoid any issues with boominess and environmental noise.
Bonus: Manually Boosting the Lows and Highs – An All-Around Solution
A setting that will likely sound great regardless of the music genre you’re listening to. As human hearing is conditioned to hear louder midrange sounds, you can get a more balanced listening experience by boosting the other frequencies. Be careful not to overdo it, as you might get an unnatural sound.
Bonus 2: Manually Tailoring It According to your Headphones
As we mentioned before, it is natural and expected of headphones that they can’t provide an entirely flat response across the frequency spectrum, attenuating and boosting certain frequencies on their own. However, the performance will largely depend on your particular model of headphones.
Some headphones might have a more pronounced response to the low frequencies, while others might shine in the mid and high frequencies. The best option is to listen carefully to a song you know well and see how you feel about the sound quality.
We recommend you tailor the equalizer according to what you’re hearing with your headphones in real-time. That way, you will be able to achieve a much more balanced response.
Other Spotify Equalizer Settings You Should Know

There’re additional Spotify Equalizer settings including audio normalization, which maintains consistent volume across tracks, and adjustments for audio quality levels to optimize streaming. We also suggests using hardware acceleration for smoother playback on compatible devices. These settings complement the equalizer adjustments, contributing to an enhanced overall listening experience on Spotify.
The equalizer isn’t the only useful tool in the Spotify app. There are some other configurations and parameters that can significantly enhance your listening experience as well.
Below, we are going to list some of these configurations and explain how you can access and set them up.
Audio Normalization
Each song on Spotify has its own gain, depending on how it was mastered. Some tracks are quieter, and some tracks are louder. This is natural and has been this way for a long time.
When you’re listening to different songs back to back, you might experience a sudden change in the volume level. This disruption of your listening experience is the problem here.
Here is where audio normalization comes in. The audio normalization feature will bring all of the songs to the exact same level of gain. That way, you won’t have any inconsistencies in your session.
You can find audio normalization in the settings inside your Spotify app, both on iOS and Android. Simply click the gear icon on the upper right part of the screen and, if you’re on iOS, go to “Playback” and you will see the settings under “Volume Level”. If you’re on Android, scroll down on the settings page until you find “Normalize Volume”.
If you’re using Spotify on your Windows or Mac OS, you can find the audio normalization options right under the “Settings” page.
It is great to mention that there are, by default, three audio normalization settings: quiet, normal, and loud. The names are self-explanatory but you should try all three to find which one suits your needs best.
Audio Quality Level
As the name implies, this setting refers to the audio quality level of your tracks within Spotify. You can choose between four settings, including the automatic option, which lets Spotify choose the best quality for you depending on whether you are using the app via wi-fi or cellular.
Spotify also allows you to independently choose the audio quality level for both when using a wi-fi connection and a cellular connection. This is useful if you want to save and not consume too much data. If you scroll down, you will also find you can pick the audio quality for your downloaded content.
On both iOS and Android, tap the gear icon at the upper right part of the screen and search for “Audio Quality”. There, you can access all of the settings regarding this feature. On Windows and Mac OS, you can find these options under the “Settings” page.
How to Change Spotify Audio Quality
Spotify offers a variety of audio quality settings that you can choose from, depending on your needs and preferences. To change your audio quality settings, follow these steps:
- Open Spotify.
- Click on the three dots in the top right corner of the screen.
- Select Settings.
- Scroll down and select Playback.
- Under Audio quality, select the quality you want to use.
- Click Save.
And here are the audio quality settings you can choose from are:
- Automatic: This setting will automatically adjust the audio quality based on your network connection.
- Low: This setting uses the lowest audio quality setting.
- Normal: This setting uses a medium audio quality setting.
- High: This setting uses the highest audio quality setting.
If you are a Spotify Premium user, you can also choose to use the “Very High” audio quality setting. This setting uses the highest possible audio quality, but it will use more data.
Experiment with different audio quality settings to find the one that sounds best to you.
Hardware Acceleration (Windows & Mac Only)
This setting is only available for Windows and Mac. If you feel like the performance of your Spotify app is not sufficient, you can activate the hardware acceleration feature to offload tasks from the software to the computer’s hardware.
To find this option, go to your Spotify app’s “Settings” page. There, scroll down and click on “Show Advanced Settings”. Under the page, you can turn on the option “Enable Hardware Acceleration”.
Transition Settings
The transition settings, as the name implies, will define how your Spotify app will handle the transition from one song to another. Basically, the app will create a crossfade between the two tracks for a smoother listening experience.
You can set the time for this gradual crossfade up to 12 seconds. The transition settings can be found, both on Android and iOS, by clicking the gear icon on the upper right part of the screen, then going to “Playback” and then “Crossfade”.
If you’re using Windows or Mac OS, you can find the feature in the “Settings” page under “Playback” and “Crossfade Songs”.
Check our guide on the Best Equalizer Settings for Car.
The Best Spotify Equalizer Settings for Earphones, Speakers, and AirPods
There are specific Spotify Equalizer settings tailored for different audio devices: earphones, speakers, and AirPods. Each device type has unique settings that best enhance their audio characteristics, optimizing music playback quality. The recommendations are designed to maximize the listening experience for each device, considering their individual acoustic properties and user preferences.
The best Spotify equalizer settings will vary depending on your listening device and your personal preferences. However, here are some general guidelines that you can use as a starting point:
1. For Earphones
- Pop: This setting is a good all-around choice for earphones, as it provides a balanced sound with slightly boosted bass and treble.
- Rock: This setting is ideal for listening to rock music, as it emphasizes the low-end frequencies.
- Jazz: This setting is perfect for listening to jazz music, as it brings out the details in the instruments.
- Classical: This setting is ideal for listening to classical music, as it creates a spacious soundstage.
2. For Speakers
- Bass Booster: This setting is perfect for listening to music with a lot of bass, such as electronic music.
- Vocal Boost: This setting is ideal for listening to music with vocals, as it brings them to the forefront.
- 3D Surround: This setting creates a surround sound effect, which can be immersive for movies and games.
3. For AirPods
- Bass Booster: This setting is perfect for listening to music with a lot of bass in Airpods, such as electronic music.
- Treble Booster: This setting is ideal for listening to music with a lot of treble, such as classical music.
- Balanced: This setting is a good all-around choice for AirPods, as it provides a balanced sound.
Best Spotify Equalizer Settings for Car
The best Spotify equalizer settings for your car will vary depending on the type of music you listen to and the sound quality of your car stereo. However, here are some general guidelines that you can use as a starting point:
1. For all Genres:
- Flat: This setting is a good all-around choice, as it provides a balanced sound.
- Bass Booster: This setting is perfect for listening to music with a lot of bass, such as electronic music.
- Vocal Boost: This setting is ideal for listening to music with vocals, as it brings them to the forefront.
- 3D Surround: This setting creates a surround sound effect, which can be immersive for movies and games.
2. For Specific Genres:
- Pop: This setting is a good all-around choice for pop music, as it provides a balanced sound with slightly boosted bass and treble.
- Rock: This setting is ideal for listening to rock music, as it emphasizes the low-end frequencies.
- Jazz: This setting is perfect for listening to jazz music, as it brings out the details in the instruments.
- Classical: This setting is ideal for listening to classical music, as it creates a spacious soundstage.
Also check out our article on ‘How to Set Up Karaoke at Home?‘ by Pawan Singh
FAQs
The equalizer on Spotify is an excellent tool to help you shape your sound the way you like, depending on what music genres you listen to and your personal preferences, so we definitely recommend you make use of its presets and manual settings.
320kbps is the highest-quality setting you can choose on the Spotify app and it is the standard for high-quality when it comes to consumer-grade audio. While the format is still lousy, it should sound good for most and provide an excellent listening experience.
Here are some tips on how to make Spotify sound like a concert:
1. Use high-quality headphones or speakers.
2. Adjust the equalizer settings to your liking.
3. Use a sound deadener to reduce background noise.
4. Listen to your music in a quiet environment.
5. Experiment with different audio quality settings.
By following these tips, you can improve the sound quality of your Spotify experience and make your music sound more like a concert.
Yes, Spotify Premium does sound better than the free version. Spotify Premium users can stream music at 320 kbps, while free users are limited to 160 kbps. This means that Premium users get a higher-quality audio stream, which can make a big difference in the sound quality of your music.
In addition to higher audio quality, Spotify Premium also offers a number of other features that can improve your listening experiences, such as ad-free listening, offline listening, and the ability to listen to music on multiple devices at the same time.
If you are a serious music listener, then Spotify Premium is definitely worth the price. The higher audio quality and additional features make it a great value for your money.
There are a few reasons why your Spotify music quality might be bad. Here are some of the most common causes:
– Your internet connection is slow. If your internet connection is slow, it can cause Spotify to stream music at a lower quality. Try testing your internet speed and see if it meets Spotify’s minimum requirements.
– Your audio settings are set to low. Spotify offers a variety of audio quality settings that you can choose from. Make sure that your audio settings are set to the highest quality possible.
– You are using a free account. Spotify-free users are limited to streaming music at 160 kbps. If you want to listen to music at a higher quality, you will need to upgrade to Spotify Premium.
– Your headphones or speakers are not high quality. Even if you are streaming music at the highest quality possible, you will not get good sound quality if your headphones or speakers are not high quality. Try using a different pair of headphones or speakers and see if it makes a difference.
If you have tried all of the above and your Spotify music quality is still bad, then you may need to contact Spotify support for help.
Conclusion
The Spotify equalizer is an amazing tool that can greatly improve your sound quality and listening experience without spending a dime. We recommend you follow the steps in our article and fiddle with the different settings to find the best ones for you.
It is also useful to check the extra settings listed in our guide, such as audio normalization, audio quality level, and hardware acceleration (if you’re using Windows or Mac OS). You might even find that you don’t need to spend money on a new pair of headphones to get better audio quality.
We hope our article on Spotify equalizer settings was helpful. If you liked the guide and felt it, consider sharing it with a friend. Feel free to contact us. Happy listening!

Hello, my name is James Longman.
I’m a writer and editor at AudioReputation. I disassembled my first portable AM/FM radio when I was only 8. At the age of 11, I burned the circuit board on my old boombox cassette player. I’m not going to explain how but it was reckless and stupid.
Since then, I have become much more careful around radios, boomboxes, and other audio devices (at least, I like to think so) but I have never lost the passion for audio equipment. Throughout 20 years of my professional career, I’ve been working for various audio equipment manufacturers and even started building speakers on my own in my little workshop.
I love the work we do here at AudioReputation. Testing, comparing, and evaluating all kinds of audio devices (speakers, soundbars, headphones, home theater systems, etc.) is something I truly enjoy. I try to be unbiased and give you my honest opinion on every piece of equipment I test. Still, you should take my reviews with a pinch of salt and always be just a little bit skeptical. The fact that I liked some speaker or soundbar doesn’t mean that you are going to love it. If you have the opportunity, you should test it/hear it before buying it.