
AudioReputation is reader-supported. When you buy through links on our site, we may earn an affiliate commission Learn More
Are you bothered by the exposed wires coming out of your speakers? Are the wires getting frizzy which makes the audio quality poor? We’re coming to your rescue! We recommend you to install banana plugs for the ultimate listening experience. So, if you want to learn how to connect banana plugs to speakers, keep reading this article.
Table of Contents
What Are Banana Plugs?
No matter if you are an expert or someone without any experience in electronics, everybody has heard of banana plugs! In technical terms, banana plugs are single-wire electrical connectors. We use them to join wires to a device. In most cases, a banana plug has a shape of a cylinder with metal bulges which are called leaves.
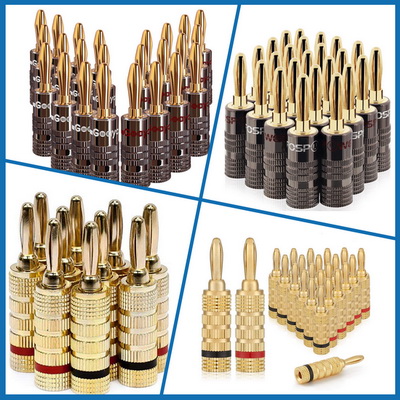
Banana plugs
Are Banana Plugs a Good Choice?
It all depends on your preference. However, most experts do prefer using a banana plug instead of a bare wire. Here are some of the reasons for that.
Banana Plugs Offer Durability
The main reason to use a banana plug is durability. While banana plugs are not difficult to install, their installation will take you some time. But we recommend that you do it because they will provide you with the longevity you cannot expect from their alternatives. Bare wires tend to loosen up over time. Moreover, they can easily get frizzy which will have a negative effect on the quality of sound your speaker produces. So, if you don’t want to work on your wires every few months, you should install banana plugs.
They Make Everything Look Cleaner
In addition, if you have OCD traits, or you just don’t like messy installations, installing a banana plug is a must for you! That’s because they give a much cleaner look to the cables attached to your speaker.
You Can Customize the Look of Your Speaker
When somebody says “banana plugs”, you probably think of red and black as their colors. However, you might be surprised to learn that banana plugs come in various colors and additions. Besides using them to make your wired connection better, you can also buy them to enhance the look of your cables!
You Won’t Have Problems with Any External Interference
Many users praise banana plugs for their ability to maintain a good signal throughout the time. Furthermore, you won’t have issues with external noise or any kind of interference when you connect them to your speakers. So, a stable, durable connection is something you can expect from banana plugs.
Some Thoughts on the Audio Quality and Banana Plugs
We gave you some important reasons to choose banana plugs over bare wires. However, we need to mention that the opinions are mixed when it comes to the audio quality. While you can be certain that banana plugs won’t mess up the sound coming from your speakers, experts are divided on whether they can improve the quality of audio. That’s especially true for those that have no experience in installing them because if you don’t connect them properly, they might interfere with your speaker’s sound quality. But, if you follow our guide, installing banana plugs and connecting them to your speakers will be a breeze!
How to Connect Banana Plugs to Speakers
Firstly, you will have to work with a speaker wire. Your first task is to cut the speaker wire to the length that you need. For that, you will need a wire cutter, commonly known as a wire stripper. We recommend that you cut your wire to be around 2 feet or 60 cm longer than you estimated. That’s because it’s important for the wire not to be too tight because that causes pressure. In case it’s under pressure for a longer period of time, it can cause damage to your devices.
Your next step is to closely examine the wire. The reason for that is to find the positive and the negative side which will then go into the positive and negative ports of banana plugs. It’s essential to do this step right to avoid damaging your speaker. In most cases, finding the positive and the negative side will be easy since the negative side is usually black while the positive is red. However, not all wires have two colors. Thus, you will have to find small letters on the insulation which indicate the positive and the negative sides of the wire.
Then, grab your wire stripper again. Now, you should examine your wire stripper to check whether it has a notch located on the inside of its blades. Use it to peel a bit of insulation. In case your cutter doesn’t have that notch, you can peal a bit of the insulation with the stripper and then use your hands to strip the insulation away. Try to do it slowly, by pulling up and twisting it, and don’t apply too much pressure. Since you are trying not to leave the wire exposed, you should carefully measure how much wire you will need to place into the banana plug and cut the isolation only for that part. Do that on both sides. The next thing you should do is twist all of the ends of the wire to prevent them from separating. But, you should make sure that you don’t twist them too much. In case they start bending, it’s time to stop.

It’s recommended to use a wire stripper with notches indicating AWG on the inside of its blades
Now, your wire is ready for the banana plug! In case you want to enhance the durability of your wire, you can solder its ends. You will need a really small amount of solder for this operation.
It’s time to take the banana plugs. First off, separate the two parts of a banana plug. In some cases, this step will require the use of a screwdriver. Then, you should put the positive side of the wire into the whole of the positive plug. You will need to push it until you see that your wire has hit the front end of the plug. In case you did everything correctly and there is a bare wire that’s not inside the banana plug, you should remove it and resize your wire. If you don’t want to repeat the whole process again, you can simply use insulating tape.
Recommended Reading :
- How to Connect a Soundbar to TV with an Optical Cable?
- How to Connect Speakers to TV Without Receiver?
- How to Connect Surround Sound to TV Without HDMI?
On the other hand, there is a chance that you didn’t cut enough insulation and that some of it is inside the banana plug. In that case, you must remove that part of the insulation. That’s because it can prevent the wire from sticking to the plug. The next step is to put back the other part of the banana plug using simply your hands or a screwdriver, depending on the type of banana plugs you have. You should repeat the whole process for each side.
Lastly, connect the banana plugs to the 5-way binding posts on the back of your speakers. You should definitely make sure that all of your audio equipment (especially the amplifier) is turned off during the whole process. It’s important to make sure that the positive side goes into the positive port and the negative into the negative port. Then, turn on your amp and play some music to see if everything works as it is supposed to.

Step-by-step guide
In Conclusion
Hopefully, you can now install banana plugs and connect them to your speakers easily and without any issues. Enjoy your quality sound and durable wires! If you found this article useful, you’ll be happy to learn that we have other great articles for you. Stay tuned!
Since the time I got my first pair of headphones in 2012, I’ve been fascinated by these little gadgets that have the power to change our moods through our favorite music. Whether it was the cheap $5 earphones or the premium JBL headphones, I have played my favorite music on tons of different audio devices for all these years.
At AudioReputation, I test and review headphones of all kinds. From popular earbuds like the Airpods pro to the expensive HIFIMAN Susvara, I always perform a deep test and present my honest and unbiased opinion to my readers.